
Views: 0 Author: Site Editor Publish Time: 2026-07-15 Origin: Site


In marine and offshore engineering, the integrity of a mooring system is only as strong as its weakest connection point. Standard rigging hardware often fails to meet the specific geometric and structural demands of windlass operations. Anchor chains require periodic extension or repair to accommodate varying depths. However, adding bulky connectors creates severe operational hazards. A protruding joint can easily jam deck machinery. This leads to catastrophic equipment failure or dangerous deployment delays.
The maritime industry relies on a highly specialized detachable mechanism to solve this exact problem. We will examine how this component joins two lengths of stud link anchor chain smoothly. This guide breaks down operational applications and compares designs to standard marine hardware. You will learn critical procurement criteria, including compliance and grading standards. Finally, we detail implementation realities to help you ensure secure, verifiable mooring connections.
Primary Application: Kenter shackles function as seamless mooring chain connectors, designed to match the exact dimensions of standard stud links so they can pass smoothly through a ship’s windlass gypsy.
Design Advantage: Unlike standard D-shackles, Kenter shackles consist of two interlocking halves, a center chock, and a locking pin, preventing operational jamming during anchor deployment.
Procurement Mandate: Selecting the right Kenter shackle requires strict alignment with the chain’s diameter, structural grade (e.g., U3, R3, R4), and mandatory IACS (International Association of Classification Societies) material certification.
Installation Risk: The most common point of failure is improper installation of the locking taper pin and lead sealing plug, which requires specific assembly protocols.
Anchor chains are manufactured in standard lengths known as shots. One standard shot typically measures 15 fathoms, or exactly 27.5 meters. Large vessels require hundreds of meters of chain to secure their position. Ships must join multiple standard shots together to build the necessary length. You need secure, detachable connections to link these sections. Crucially, these connections must not alter the overall geometric profile of the chain.
The solution lies in specialized hardware engineered for this precise task. A mooring chain connector functions differently from generic lifting gear. It matches the exact width, length, and shape of standard stud links. When you install it, it becomes virtually indistinguishable from the rest of the chain line. The interlocking halves maintain the continuous flow of the metal links.
Utilizing properly specified connecting hardware guarantees seamless operational performance. The joined chain feeds directly over the wildcat or gypsy of the windlass. It does not snag on the machinery. It avoids jumping out of the grooved pockets during rapid deployment. Preventing these mechanical jams protects deck machinery from severe shock loads. You avoid costly repairs and maintain uninterrupted maritime operations.
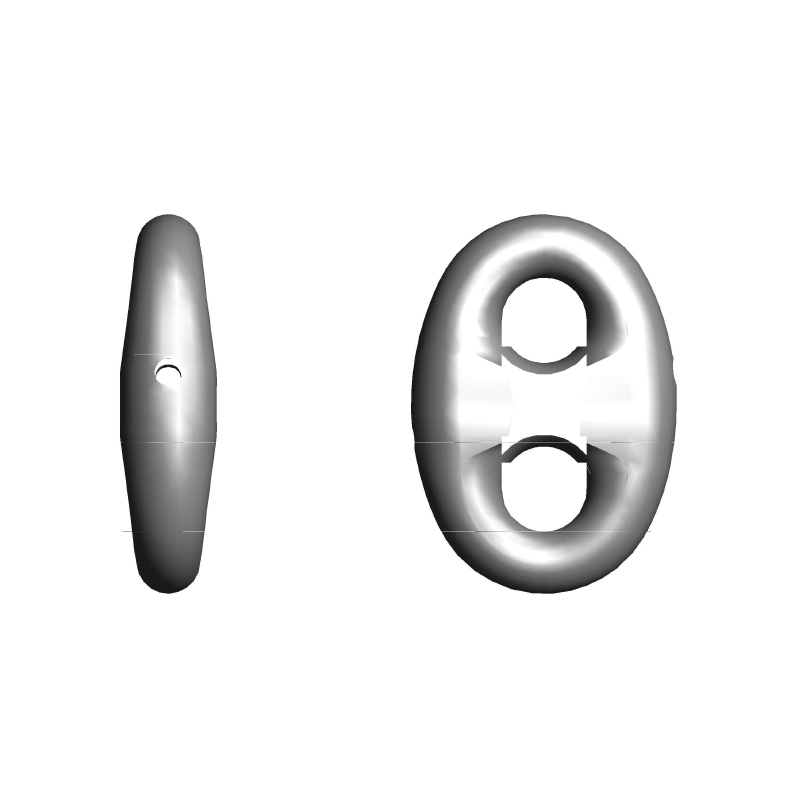
Connecting hardware comes in several variations. We must understand the structural differences between them to ensure safe marine operations. The geometric profile dictates where you can safely install each component within a mooring array.
Standard D-shackles feature a prominently bulky pin and a wide bow. Their asymmetrical shape protrudes significantly past the chain links. They frequently catch on fairleads. They jam violently inside windlass mechanisms. Conversely, a Kenter Shackle features a streamlined, perfectly symmetrical design. It mimics the exact dimensions of a standard stud link. It passes through tight mechanical clearances without hesitation.
Standard components rely heavily on a single pin to bear the entire load. This introduces severe shear-stress vulnerabilities. If the pin bends or fails, the connection breaks instantly. Specialized interlocking hardware distributes tension evenly across two identical halves. The center chock absorbs lateral crushing forces. This balanced load distribution prevents the stress fractures commonly found in conventional pins.
Feature Dimension | Standard D-Type Joining Hardware | Kenter-Type Hardware |
|---|---|---|
Geometric Profile | Asymmetrical, bulky, protruding pin | Symmetrical, mimics standard stud link |
Load Distribution | Concentrated shear stress on the pin | Evenly distributed across interlocking halves |
Windlass Compatibility | Poor (prone to jamming and snagging) | Excellent (feeds seamlessly) |
Primary Application | Static end-terminations at the anchor shank | Mid-line connections between chain shots |
Our evaluation verdict remains strictly defined by the deployment zone. Standard hardware remains perfectly acceptable for static end-terminations. You often use a standard Shackle to connect the final chain link directly to the anchor shank. However, symmetrical interlocking connectors are strictly required for mid-line connections. Any joint passing over load-bearing deck machinery must utilize a streamlined design.
Selecting the correct components demands strict attention to technical specifications. A single mismatched component compromises the entire marine mooring array. You must evaluate diameter, structural grade, metallurgical compliance, and environmental protection.
You must dimensionally match the connecting hardware to the chain. A 32mm chain strictly requires a 32mm connector. Even minor dimensional variations cause uneven wear. Furthermore, the steel grade must equal or exceed the chain's inherent grade. Standard shipping relies on Grade 2 or Grade 3 (U3). Offshore oil and gas operations demand R3 or R4 grades. Using a lower-grade connector instantly compromises the Minimum Breaking Load (MBL). This creates an immediate weak point in your system.
We strongly advise against procuring uncertified connecting hardware for commercial marine use. Unverified metallurgy introduces catastrophic risks. You must verify traceability and testing certificates. Look for documentation from recognized bodies within the International Association of Classification Societies (IACS). Recognized bodies include DNV, ABS, Lloyd’s Register (LR), or Bureau Veritas (BV). These certificates guarantee the component underwent rigorous ultrasonic and proof-load testing before leaving the foundry.
Deploying metal hardware in saltwater accelerates rapid corrosion. You must evaluate anti-corrosion finishes based on your specific deployment environment. Components often feature bituminous paint for standard operations. Others utilize hot-dip galvanizing for extended submersion periods. Choose your surface treatment based on expected maintenance intervals. Regular inspections dictate whether you need heavy galvanization or standard marine coatings.
Even the highest-grade hardware fails if you assemble it incorrectly. Understanding the mechanical anatomy prevents catastrophic mid-sea separations. These components require specialized knowledge during field assembly.
The mechanism comprises four distinct parts. It features two interlocking identical halves. It includes a center chock, often called a stud. It utilizes a tapered spile pin. Finally, it uses a soft lead pellet for sealing. Each part plays a critical role in maintaining structural integrity.
Following strict sequential steps ensures a secure connection. Deck crews must perform these actions methodically.
Align the Halves: Slide the two identical halves together through the adjacent chain links you wish to connect. Ensure they interlock smoothly without forcing them.
Insert the Chock: Place the center chock directly between the interlocked halves. This locks the two main pieces in place and prevents lateral movement.
Secure the Pin: Drive the tapered spile pin diagonally through the pre-drilled holes in the halves and the center chock. Use a hammer to seat it firmly.
Seal the Cavity: Hammer the lead pellet into the remaining open cavity above the pin. Deform the lead completely to seal the pin hole. This prevents the pin from backing out under heavy vibration.
Field installations frequently encounter specific failure modes. You must train deck crews to recognize these common pitfalls.
Incomplete Lead Sealing: The leading cause of failure is the loss of the taper pin. This happens due to improper lead plug installation. If the lead does not deform completely, vibration shakes the pin loose over time.
Mismatched Wear: Never interchange halves from different connectors. Even if they share the exact same nominal size, halves are machined as perfectly matched sets at the factory. Mixing them leads to poor fitment, uneven stress, and structural failure.
Inadequate Pin Seating: Failing to drive the tapered pin fully home leaves the center chock vulnerable. The chock can rattle loose under heavy tension loads.
Sourcing reliable marine hardware requires vetting your supply chain. Do not rely on generic trading entities. You need technical partners who understand marine metallurgy.
Shortlist suppliers who perform in-house proof load testing. They should also execute break load testing on site. Trading entities simply move boxes. Specialized manufacturers control the metallurgical quality. They provide immediate access to destructive and non-destructive testing reports. They maintain strict quality assurance protocols.
When you contact a supplier, provide precise technical details. Vague requests lead to mismatched hardware. Ensure you include the following data points:
Exact chain nominal diameter in millimeters or inches.
Required chain grade (e.g., U3, R3, R4).
Required Classification Society certificate (e.g., DNV, ABS).
Total quantity needed.
Required delivery timeline, explicitly factoring in mandatory testing lead times.
Request a sample material test report (MTR) from potential vendors during the evaluation phase. Do this before issuing any purchase orders. Reviewing an MTR allows you to verify their compliance standards immediately. Ensure their documentation clearly outlines chemical composition and mechanical properties. Reject suppliers who hesitate to provide historical testing data.
This specialized hardware is never a generic rigging accessory. It acts as a highly engineered, life-critical component in maritime mooring systems. Its primary use remains seamlessly linking chain lengths without disrupting deck machinery operations. When appropriately specified, it guarantees the safe deployment of massive anchor systems.
Base your final purchasing decisions on three core principles. First, demand strict dimensional alignment with your existing chain. Second, verify all metallurgical grades through documentation. Third, insist on mandatory IACS certification for every unit. Finally, prioritize correct installation protocols. Train your crew extensively on securing the taper pin and lead plug. Taking these practical steps guarantees long-term mooring reliability and prevents catastrophic mid-sea failures.
A: Yes, provided it passes a thorough visual and non-destructive testing (NDT) inspection. However, the tapered pin and lead sealing plug must be replaced with new ones every time the shackle is dismantled.
A: Dismantling requires punching or drilling out the lead plug, driving out the tapered pin with a hammer and drift punch, and sliding the center chock out to separate the two interlocking halves.
A: When properly matched by size and grade, a Kenter shackle is engineered to have a Minimum Breaking Load (MBL) equal to or slightly greater than the corresponding stud link chain to ensure it does not become a weak point.
A: A Kenter shackle joins two chains of the same size. A Pear-shaped link is an asymmetrical connector typically used to join chains of different diameters or to connect a chain directly to an anchor or larger mooring ring.


